AWS, Packer, and OpenAI's Evolution Strategies Code
I have very little experience with programming in clusters, so when OpenAI released their evolution strategies starter code which runs only on EC2 instances, I took this opportunity to finally learn how to program in clusters the way professionals do it.
Amazon Web Services
The first task is to get an Amazon Web Services (AWS) account. AWS offers a mind-bogglingly large amount of resources for doing all sorts of cloud computing. For our purposes, the most important feature is the Elastic Comptue Cloud (EC2). The short description of these guys is that they allow me to run code on heavily-customized machines that I don’t own. The only catch is that running code this way costs some money commensurate with usage, so watch out.
Note that joining AWS means we start off with one year of the free-tier option. This isn’t as good as it sounds, though, since many machines (e.g. those with GPUs) are not eligible for free tier usage. You still have to watch your budget.
One immediate aspect of AWS to understand are their security credentials. They state (emphasis mine):
You use different types of security credentials depending on how you interact with AWS. For example, you use a user name and password to sign in to the AWS Management Console. You use access keys to make programmatic calls to AWS API actions.
To use the OpenAI code, I have to provide my AWS access key and secret access
keys, which are officially designated as AWS_ACCESS_KEY_ID and
AWS_SECRET_ACCESS_KEY, respectively. These aren’t initialized by default; we
have to explicitly create them. This means going to the Security Credentials
tab, and seeing:
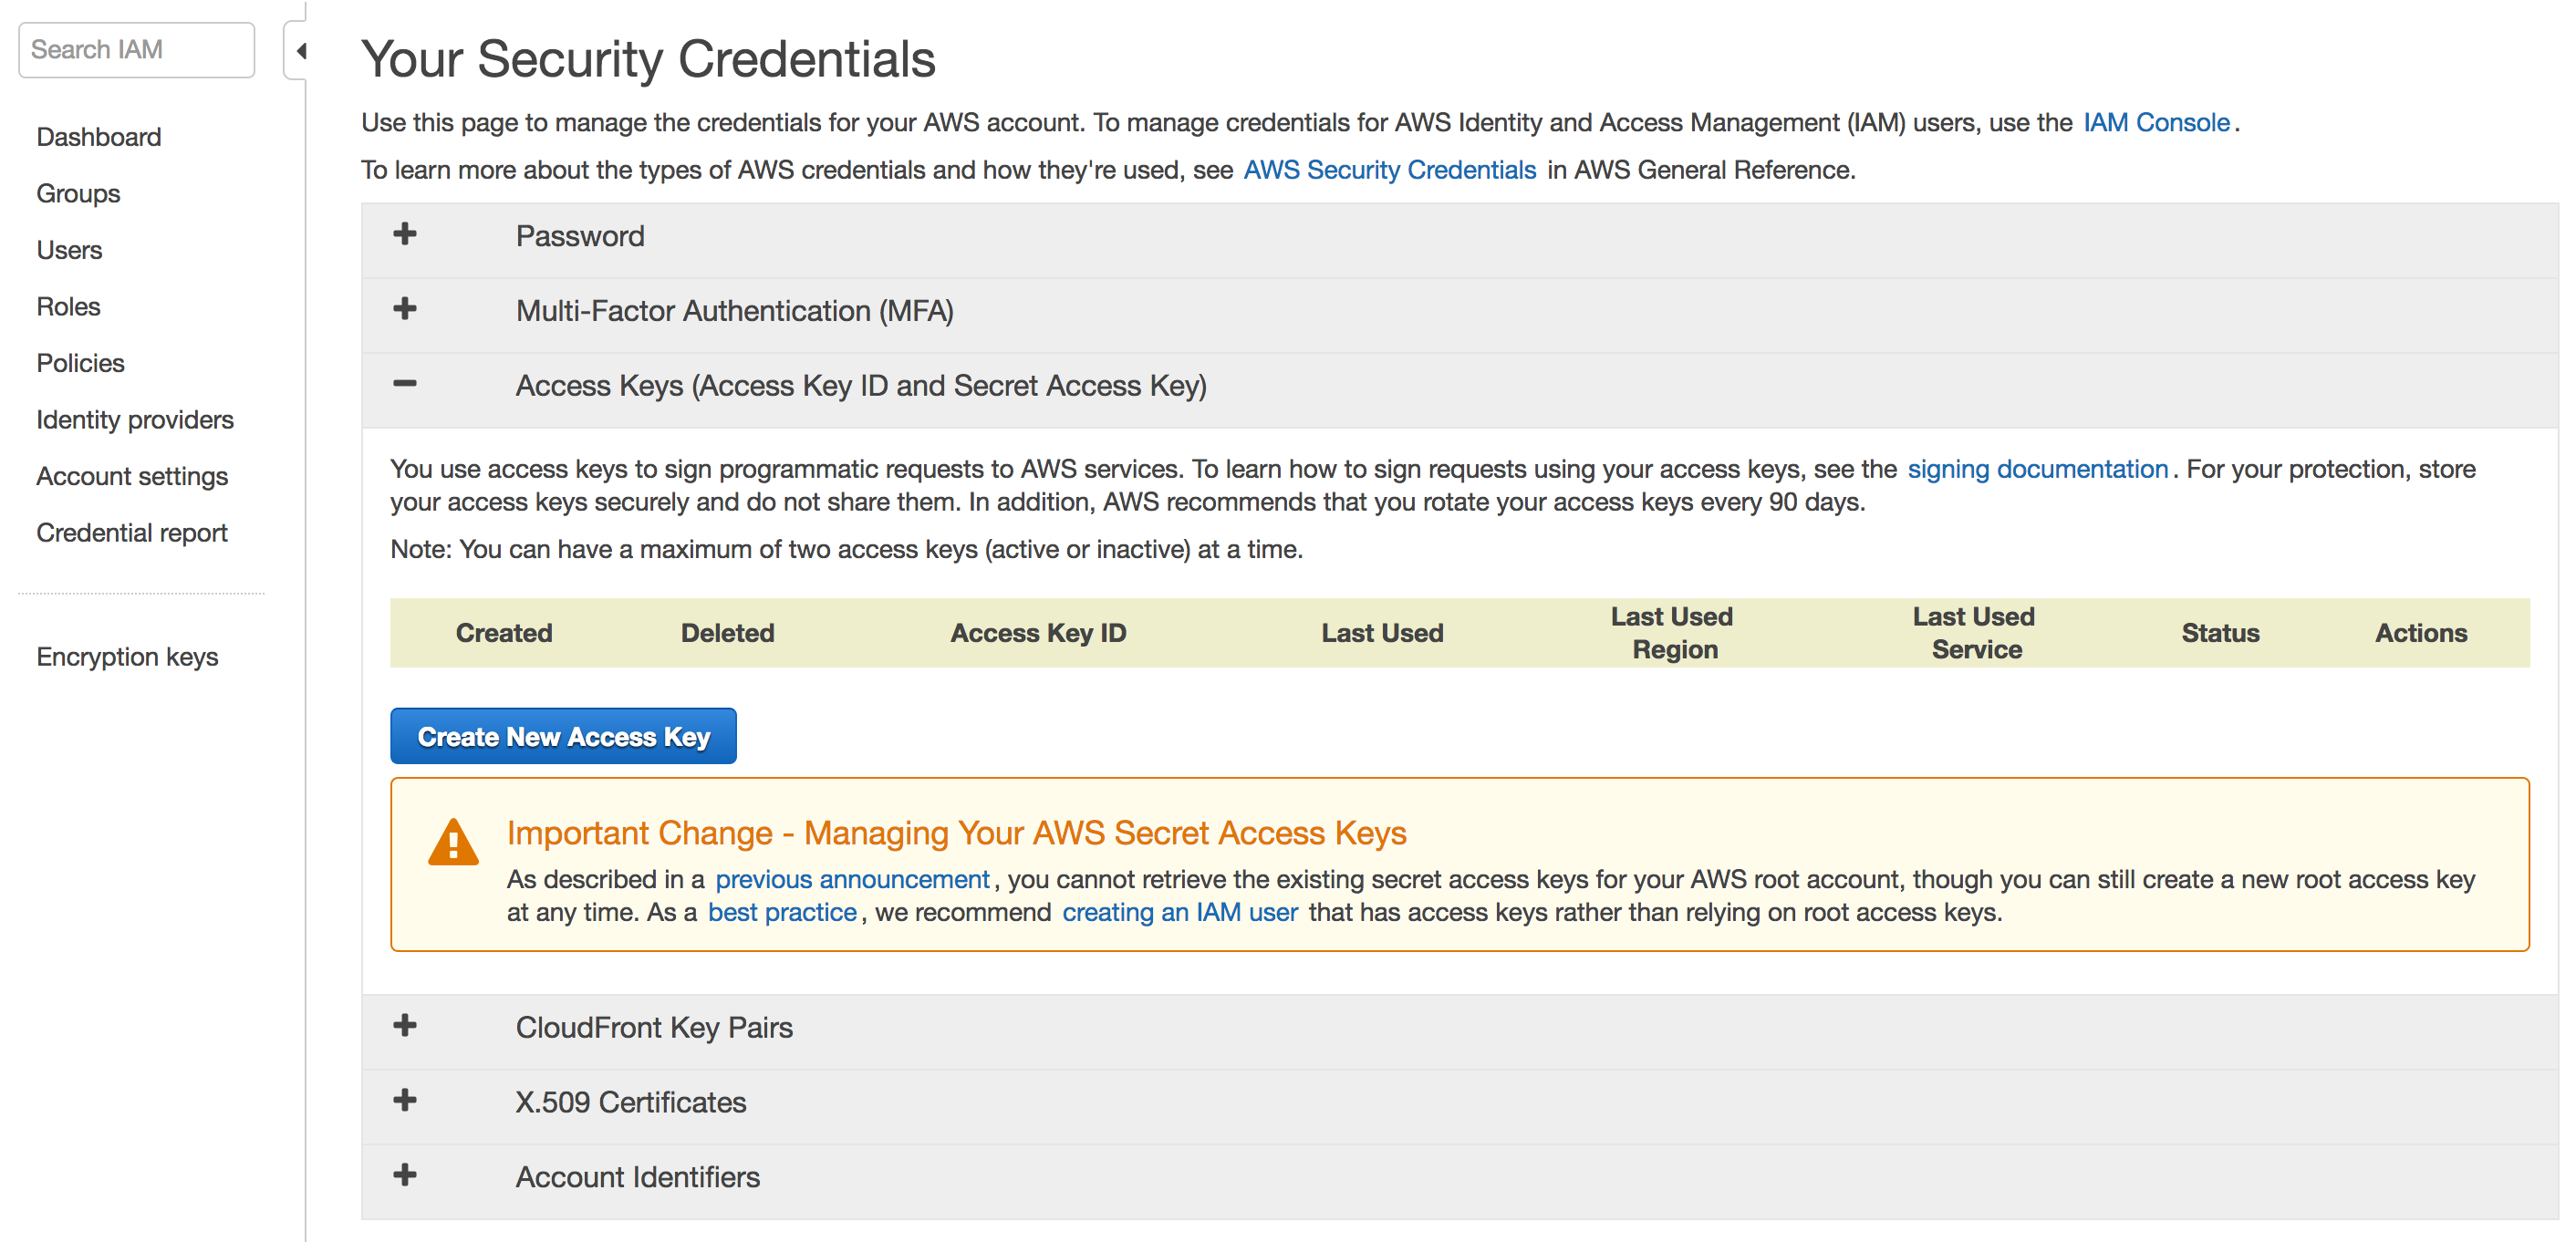
You can create root access and secret access keys this way, but this is not the recommended way. To be clear, I took the above screenshot during the “root perspective,” so make sure you’re not seeing this on your computer. AWS strongly recommends to instead make a new user with administrative requirements, which effectively means it’s as good as the root account (minus the ability to view billing information). You can see their official instructions here to create groups with administrative privileges. The way I think of it, I’m a systems administrator and have to create a bunch of users for a computer. Except here, I only need to create one. So maybe this is a bit unnecessary, but I think it’s helpful to get used to the good practices as soon as possible. This author even suggests throwing away (!!) the root AWS password.
After following those instructions I had a “new” user and created the two access
keys. These must be manually downloaded, where they’ll appear in a .csv file.
Don’t lose them!
Next, we have to provide these credentials. When running packer code, as I’ll
show in the next section, it suffices to either provide them as command line
arguments, or use more secure ways such as adding them to your .bashrc file. I
chose the latter. This page from AWS provides further information about how
to provide your credentials, and the packer documentation contains similar
instructions.
On a final note regarding AWS, I had a hard time figuring out how to actually log in as the Administrator user, rather than the root. This StackOverflow question really helped out, but I’m baffled as to why this isn’t easier to do.
Installing and Understanding Packer
As stated in the OpenAI code, we must use something known as packer to run the
code. After installing it, I went through their basic example. Notice that
in their .json file, they have the following:
"variables": {
    "aws_access_key": "",
    "aws_secret_key": ""
},
where the access and secret keys must be supplied in some way. They could be
hard-coded above if you want to type them in there, but as mentioned earlier, I
chose to use environment variables in .bashrc.
Here are a couple of things to keep in mind when running packer’s basic example:
-
Be patient when the
packer buildcommand is run. It does not officially conclude until one sees:==> Builds finished. The artifacts of successful builds are: --> amazon-ebs: AMIs were created: us-east-1: ami-19601070where the last line will certainly be different if you run it.
-
The output, at least in this case, is an Amazon Machine Image (AMI) that I own. Therefore, I will have to start paying a small fee if this image remains active. There are two steps to deactivating this and ensuring that I don’t have to pay: “deregistering” the image and deleting the (associated) snapshot. For the former, go to the EC2 Management Console and see the
IMAGES
/ AMIs
drop-down menu, and for the latter, useELASTIC BLOCK STORE / Snapshots. From my experience, deregistering can take several minutes, so just be patient. These have to happen in order, as deleting the snapshot first will result in an error which says that the image is still using it. -
When launching (or even when deactivating, for that matter) be careful about the location you’re using. Look at the upper right corner for the locations. The “us-east-1” region is “Northern Virginia” and that is where the image and snapshot will be displayed. If you change locations, you won’t see them.
-
Don’t change the “region” argument in the “builders” list; it has to stay at “us-east-1”. When I first fired this up and saw that my image and snapshot were in “us-east-1” instead of the more-desirable “us-west-1” (Northern California) for me, I tried changing that argument and re-building. But then I got an error saying that the image couldn’t be found.
I think what happens is that the provided “source_ami” argument is the packer author’s fixed, base machine that he set up for the purposes of this tutorial, with packer installed (and maybe some other stuff). Then the
.jsonfile we have copies that image, as suggested by this statement in the docs (emphasis mine):Congratulations! You’ve just built your first image with Packer. Although the image was pretty useless in this case (nothing was changed about it), this page should’ve given you a general idea of how Packer works, what templates are and how to validate and build templates into machine images.
In packer’s slightly more advanced example, we get to see what happens
when we want to pre-install some software on our machines, and it’s here where
we see packer’s benefits start to truly shine. In that new example, the
“provisions” list lets us run command line arguments to install desired packages
(i.e. sudo apt-get install blahblahblah). When I ssh-ed into the generated
machine — a bit of a struggle at first since I didn’t realize the username to
get in was actually ubuntu instead of ec2-user — I could successfully run
redis-server on the command line and it was clear that the package had been
installed.
In OpenAI’s code, they have a full script of commands which they load in. Thus, any image that we create from the packer build will have those commands run, so that our machines will have exactly the kind of software we want. In particular, OpenAI’s script installs TensorFlow, gym, the ALE, and so on. If we didn’t have packer, I think we would have to manually execute that script for all the machines. To give a sense of how slow that would be, the OpenAI ES paper said they once tested with 1,440 machines.
OpenAI’s Code
The final stage is to understand how to run OpenAI’s code. As mentioned earlier,
there’s a dependency.sh shell script which will install stuff on our
cloud-computing machines. Unfortunately, MuJoCo is not open source.
(Fortunately, we might have an alternative with OpenAI’s RoboSchool — I
hope to see that work out!) Thus, we have to add our own license. For me, this
was a two-stage process.
First, in the configuration file, I added the following two file provisioners:
"provisioners": [
  {
    "type": "file",
    "source": "/home/daniel/mjpro131",
    "destination": "~/"
  },
  {
    "type": "file",
    "source": "/home/daniel/mjpro131/mjkey.txt",
    "destination": "~/"
  },
  {
    "type": "shell",
    "scripts": [
      "dependency.sh"
    ]
  }
]
In packer, the elements in the “provisioners” array are executed in order of
their appearance, so I wanted the files sent over to the home directory on the
images so that they’d be there for the shell script later. The “source” strings
are where MuJoCo is stored on my personal machine, the one which executes
packer build packer.json.
Next, inside dependency.sh, I simply added the following two sudo mv
commands:
#######################################################
# WRITE CODE HERE TO PLACE MUJOCO 1.31 in /opt/mujoco #
# The key file should be in /opt/mujoco/mjkey.txt     #
# Mujoco should be installed in /opt/mujoco/mjpro131  #
#######################################################
sudo mv ~/mjkey.txt /opt/mujoco/
sudo mv ~/mjpro131 /opt/mujoco/
(Yes, we’re still using MuJoCo 1.31. I’m not sure why the upgraded versions don’t work.)
This way, when running packer build packer.json, the relevant portion of the
output should look something like this:
amazon-ebs: + sudo mkdir -p /opt/mujoco
amazon-ebs: + sudo mv /home/ubuntu/mjkey.txt /opt/mujoco/
amazon-ebs: + sudo mv /home/ubuntu/mjpro131 /opt/mujoco/
amazon-ebs: + sudo tee /etc/profile.d/mujoco.sh
amazon-ebs: + sudo echo 'export MUJOCO_PY_MJKEY_PATH=/opt/mujoco/mjkey.txt'
amazon-ebs: + sudo tee -a /etc/profile.d/mujoco.sh
amazon-ebs: + sudo echo 'export MUJOCO_PY_MJPRO_PATH=/opt/mujoco/mjpro131'
amazon-ebs: + . /etc/profile.d/mujoco.sh
where the sudo mv commands have successfully moved my MuJoCo materials over to
the desired target directory.
As an aside, I should also mention the other change I made to packer.json: in
the “ami_regions” argument, I deleted all regions except for “us-west-1”, since
otherwise images would be created in all the regions listed.
Running packer build packer.json takes about thirty minutes to run. Upon
concluding, I saw the following output:
==> Builds finished. The artifacts of successful builds are:
--> amazon-ebs: AMIs were created:

us-west-1: ami-XXXXXXXX
where for security reasons, I have not revealed the full ID. Then, inside
launch.py, I put in:
# This will show up under "My AMIs" in the EC2 console.
AMI_MAP = {
    "us-west-1": "ami-XXXXXXXX"
}
The last step is to call the launcher script with the appropriate arguments.
Before doing so, make sure you’re using Python 3. I originally ran this with
Python 2.7 and was getting some errors. (Yeah, yeah, I still haven’t changed
even though I said I would do so four years ago; blame backwards
incompatibility.) One easy way to manage different Python versions on one
machine is to use Python virtual environments. I started a new one with Python
3.5 and was able to get going after a few pip install commands.
You can find the necessary arguments in the main method of launch.py. To
understand these arguments, it can be helpful to look at the boto3
documentation, which is the Python library that interfaces with AWS. In
particular, reading the create_instances documentation will be useful.
I ended up using:
python launch.py ../configurations/humanoid.json \
    --key_name="MyKeyPair" \
    --s3_bucket="s3://put-name-here" \
    --region_name="us-west-1" \
    --zone="us-west-1b" \
    --master_instance_type="m4.large" \
    --worker_instance_type="t2.micro" \
    --security_group="default" \
    --spot_price="0.05"
A few pointers:
- Make sure you run
sudo apt install awscliif you don’t have the package already installed. - Double check the default arguments for the two access keys. They’re slightly
different than what I used in the packer example, so I adjusted my
.bashrcfile. - “MyKeyPair” comes from the
MyKeyPair.pemfile which I created via the EC2 console. - The
s3_bucketargument is based on AWS Simple Storage Service. I made my own unique bucket name via the S3 console, and to actually provide it as an argument, write it ass3://put-name-herewhereput-name-hereis what you created. - The
region_nameshould be straightforward. Thezoneargument is similar, except we add letters at the end since they can be thought of as “subsets” of the regions. Not all zones will be available to you, since AWS adjusts what you can use so that it can more effectively achieve load balancing for its entire service. - The
master_instance_typeandworker_instance_typearguments are the names of the instance types; see this for more information. It turns out that the master requires a more advanced (and thus more expensive) type due to EBS optimization. I chose t2.micro for the workers, which seems to work and is better for me since that’s the only type eligible for the free tier. - The
security_groups you have can be found in the EC2 console underNETWORK & SECURITY / Security Groups. Make sure you use the name, not the ID; the names are NOT the strings that look like “sg-XYZXYZXYZ”. Watch out! -
Finally, the
spot_priceindicates the maximum amount to bid, since we’re using “Spot Instances” rather than “On Demand” pricing. OpenAI’s README says:It’s resilient to worker termination, so it’s safe to run the workers on spot instances.
The README says that because spot instances can be terminated if we are out-bid.
By the way, to be clear on what I mean when I talk about the “EC2 Console” and “S3 Console”, here’s the general AWS console:
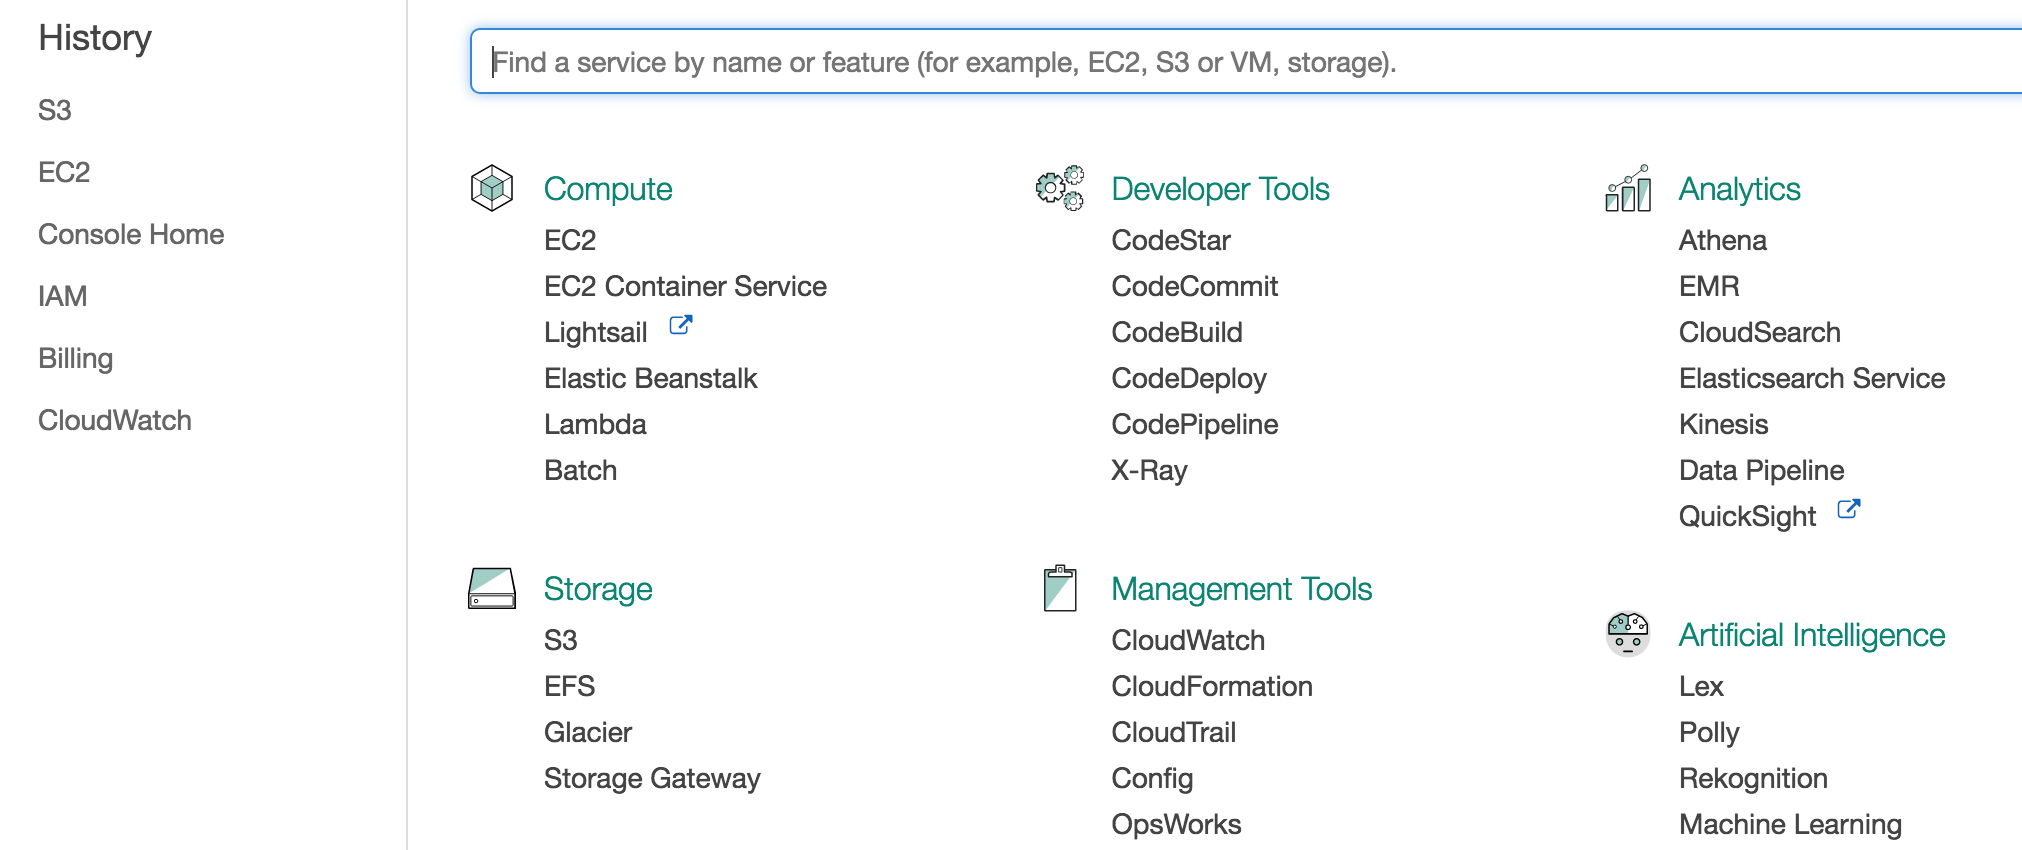
The desired consoles can be accessed by clicking “EC2” or “S3” in the above.
If all goes well, you should see a message like this:
Scaling group created
humanoid_20170530-133848 launched successfully.
Manage at [Link Removed]
Copy and paste the link in your browser, and you will see your instance there, running OpenAI’s code.