Practicing ROS Programming
I am currently engaging in a self-directed, badly-needed crash course on ROS Programming. ROS (Robot Operating System) is commonly used for robotics programming and research, and is robot-agnostic so knowledge of ROS should generalize to different robot types. Yet even after publishing a robotics paper, I still didn’t feel like I understood how my ROS code was working under the hood since other students had done much of the lower-level stuff earlier. This blog post thus summarizes what I did to try and absorb ROS as fast as possible.
To start learning about ROS, it’s a good idea (indeed, perhaps mandatory) to take a look at the excellent ROS Wiki. ROS is summarized as:
ROS (Robot Operating System) provides libraries and tools to help software developers create robot applications. It provides hardware abstraction, device drivers, libraries, visualizers, message-passing, package management, and more. ROS is licensed under an open source, BSD license.
The ROS wiki is impressively rich and detailed. If you scroll down and click “Tutorials”, you will see (as of this writing) twenty for beginners, and eight for more advanced users. In addition, the Wiki offers a cornucopia of articles related to ROS libraries, guidelines, and so on.
It’s impossible to read all of this at once, so don’t! Stick with the beginner tutorials for now, and try and remember as much as you can. I recorded my notes in my GitHub repository for my “self-studying” here. (Incidentally, that repository is something I’m planning to greatly expand this summer with robotics and machine learning concepts.)
As always, it is faster to learn by doing and reading, rather than reading alone, so it is critical to run the code in the ROS tutorials. Unfortunately, the code they use involves manipulating a “Turtle Sim” robot. This is perhaps my biggest disappointment with the tutorials: the turtle is artificial and hard to relate to real robots. Of course, this is somewhat unavoidable if the Wiki (and ROS as a whole) wants to avoid providing favoritism to certain robots, so perhaps it’s not fair criticism, but I thought I’d bring it up anyway.
To alleviate the disconnect between a turtle and what I view as a “real robot,” it is critical to start running this on a real robot. But since real robots run on the order of many thousands of dollars and exhibit all the vagaries of what you would expect from complex, physical systems (wear and tear, battery drainage, breakdowns, etc.), I highly recommend that you start by using a simulator.
In the AUTOLAB, I have access to a Fetch and a Toyota HSR, both of which
provide a built-in simulator using Gazebo. This simulator is designed to
create a testing environment where I can move and adjust the robot in a variety
of ways, without having to deal with physical robots. The advantage of investing
time in testing the simulator is that the code one uses for that should
directly translate to the real, physical robot without any changes, apart from
adjusting the ROS_MASTER_URI environment variable.
Details on the simulator should be provided in the manuals that you get for the
robots. Once the simulator is installed (usually via sudo apt-get install)
and working, the next step is to figure out how to code. One way to do this is
to borrow someone’s existing code base and tweak it as desired.
For the Fetch, my favorite code base is the one used in the University of Washington’s robotics course. It is a highly readable, modular code base which provides a full-blown Python Fetch API with much of the stuff I need: arm movement, base movement, head movement, etc. On top of that, there’s a whole set of GitHub wiki pages which provides high-level descriptions of how ROS and other things work. When I was reading these — which was after I had done a bit of ROS programming — I was smiling and nodding frequently, as the tutorials had confirmed some of what I had assumed was happening.
The primary author of the code base and Wiki is Justin Huang, a PhD student with Professor Maya Cakmak. Justin, you are awesome!
I ended up taking bits and pieces from Justin’s code, and added a script for dealing with camera images. My GitHub code repository here contains the resulting code, and this is the main thing I used to learn ROS programming. I documented my progress in various README files in that repository, so if you’re just getting started with ROS, you might find it helpful.
Playing around with the Gazebo simulator, I was able to move the Fetch torso to its highest position and then assign the joint angles so that it’s gripper actually coincides with the base. Oops, heh, I suppose that’s a flaw with the simulator?
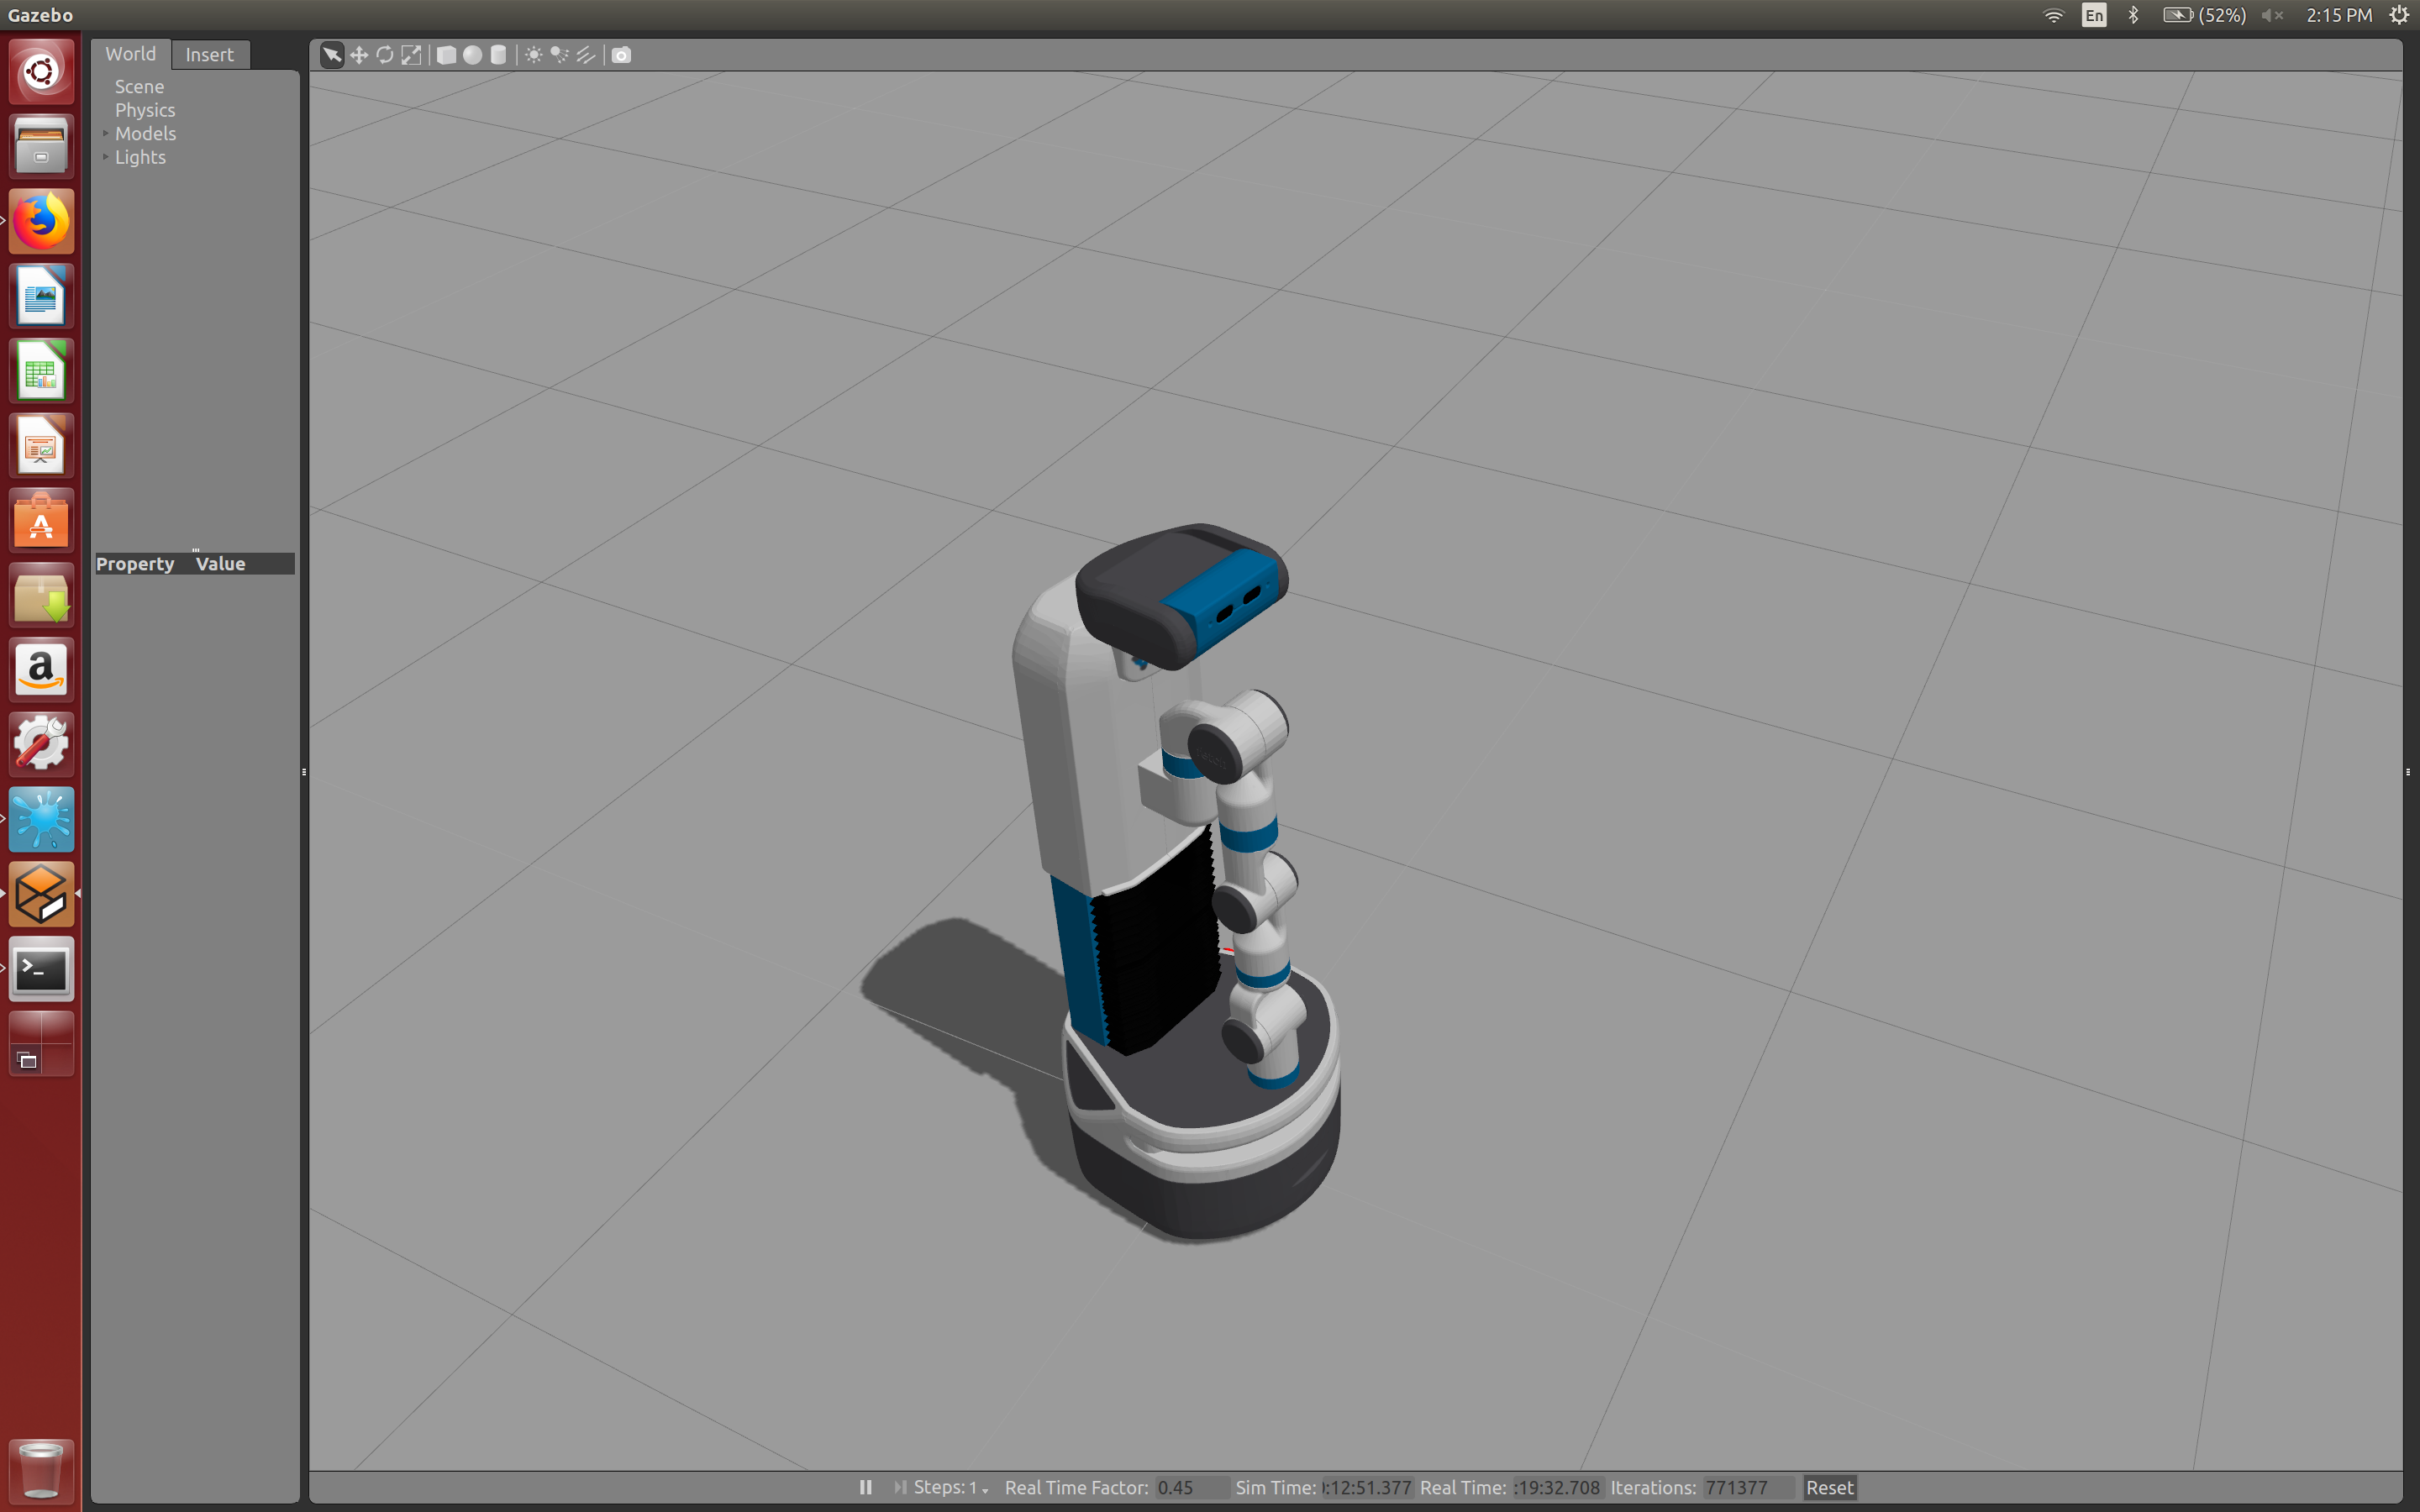
The amusing result when you command the Fetch's arm to point directly downards.
The gripper "cuts" through the base, which can't happen on the physical robot.
Weird physics notwithstanding, the Gazebo simulator has been a lifesaver for me in understanding ROS, since I can now see the outcome on a simulated version of the real robot. I hope to continue making progress in learning ROS this summer, and to use other tools (such as rviz and MoveIt) that could help accelerate my understanding.
I’m currently en route to the International Conference on Robotics and Automation (ICRA) 2018, which should provide me with another environment for massive learning on anything robotics. If you’re going to ICRA and would like to chat, please drop me a line.