Getting Started with SoftGym for Deformable Object Manipulation
This is a regularly updated post, last updated October 05, 2023.
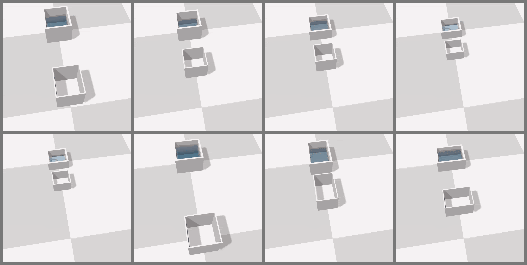
Visualization of the PourWater environment from SoftGym. The animation is
from the project website.
Over the last few years, I have enjoyed working on deformable object manipulation for robotics. In particular, it was the focus of my Google internship work, and I previously did some work with deformables before that, highlighted with our BAIR Blog post here. In this post, I’d like to discuss the SoftGym simulator, developed by researchers from Carnegie Mellon University in their CoRL 2020 paper. I’ve been exploring this simulator to see if it might be useful for my future projects, and I am impressed by the simulation quality and how it also has support for fluid simulation. The project website has more information and includes impressive videos. This blog post will be similar in spirit to one I wrote almost a year ago about using a different code base (rlpyt) with a focus on the installation steps for SoftGym.
Installing SoftGym
The first step is to install SoftGym. The provided README has some information but it wasn’t initially clear to me, as shown in my GitHub issue report. As I stated in my post on rlpyt, I like making long and detailed GitHub issue reports that are exactly reproducible.
The main thing to understand when installing is that if you’re using an Ubuntu 16.04 machine, you (probably) don’t have to use Docker. (However, Docker is incredibly useful in its own right, so I encourage you to learn how to use it if you haven’t done so already.) If you’re using Ubuntu 18.04, then you definitely have to use Docker. However, Docker is only used to compile PyFleX, which has the physics simulation for deformables. The rest of the repository can be managed through a standard conda environment.
Here’s a walk-through of my installation and compilation steps on an Ubuntu 18.04 machine, and I assume that conda is already installed. If conda is not installed, I encourage you to check another blog post which describes my conda workflow.
So far, the code has worked for me on a variety of CUDA and NVIDIA driver versions. You can find the CUDA version by running:
seita@mason:~ $ nvcc --version
nvcc: NVIDIA (R) Cuda compiler driver
Copyright (c) 2005-2018 NVIDIA Corporation
Built on Sat_Aug_25_21:08:01_CDT_2018
Cuda compilation tools, release 10.0, V10.0.130
For example, the above means I have CUDA 10.0. Similarly, the driver version
can be found from running nvidia-smi.
Now let’s get started by cloning the repository and then creating the conda environment:
conda env create -f environment.yml
This command will create a conda environment that has the necessary packages with their correct version. However, there’s one more package to install, the pybind11 package, so I would install that after activating the environment:
conda activate softgym
conda install pybind11
At this point, the conda environment should be good to go.
Next we have the most interesting part, where we use Docker. Here’s the installation guide for Ubuntu machines in case it’s not installed on your machine yet. I’m using Docker version 19.03.6. A quick refresher on terminology: Docker has images and containers. An image is like a recipe, whereas a container is an instance of it. StackOverflow has a more detailed explanation. Therefore, after running this command:
docker pull xingyu/softgym
we are downloading the author’s pre-provided Docker image, and it should be
listed if you type in docker images on the command line:
seita@mason:~$ docker images
REPOSITORY                           TAG                             IMAGE ID            CREATED             SIZE
xingyu/softgym                       latest                          2cbcd6a50965        3 months ago        2.44GB
If you’re running into issues with requiring “sudo”, you can mitigate this by adding yourself to a “Docker group” so that you don’t have to type it in each time. This Ask Ubuntu post might be helpful.
Next, we have to run a command to start a container. Here, we’re using
nvidia-docker since this requires CUDA, as one would expect given that FleX
is from NVIDIA. This is not installed when you install Docker, so please refer
to this page for installation instructions. Once that’s done, to be safe,
I would check to make sure that nvidia-docker -v works on your command line
and that the version matches what’s printed from docker -v. I don’t know if
it is necessary to have the two versions match.
As mentioned earlier, we have to start a container. Here is the command I use:
(softgym) seita@mason:~/softgym$ nvidia-docker run \
    -v /home/seita/softgym:/workspace/softgym \
    -v /home/seita/miniconda3:/home/seita/miniconda3 \
    -v /tmp/.X11-unix:/tmp/.X11-unix \
    --gpus all \
    -e DISPLAY=$DISPLAY \
    -e QT_X11_NO_MITSHM=1 \
    -it xingyu/softgym:latest bash
Here’s an explanation:
- The first
-vwill mount/home/seita/softgym(i.e., where I cloned softgym) to/workspace/softgyminside the Docker container’s file system. Thus, when I enter the container, I can change directory to/workspace/softgymand it will look as if I am in/home/seita/softgymon the original machine. The/workspaceseems to be the default directory we start in Docker containers. - A similar thing happens with the second mounting command for miniconda. In fact I’m using the same exact directory before and after the colon, which means the directory structure is the same inside the container.
- The
-itandbashportions will create an environment in the container which lets us type in things on the command line, like with normal Ubuntu machines. Here, we will be the root user. The Docker documentation has more information about these arguments. Note that-itis shorthand for-i -t. - The other commands are copied from the SoftGym Docker README.
October 2023 update: if you are running Ubuntu 22.04, I have gotten the
compilation working with a few modifications. First, I use docker instead of
nvidia-docker since it seems like a separate nvidia-docker installation is
not necessary. Second, I omit the --gpus all argument.
Running the command means I enter a Docker container as a “root” user, and you
should be able to see this container listed if you type in docker ps in
another tab (outside of Docker) since that shows the activate container IDs. At
this point, we should go to the softgym directory and run the scripts to (1)
prepare paths and (2) compile PyFleX:
root@82ab689d1497:/workspace# cd softgym/
root@82ab689d1497:/workspace/softgym# export PATH="/home/seita/miniconda3/bin:$PATH"
root@82ab689d1497:/workspace/softgym# . ./prepare_1.0.sh
(softgym) root@82ab689d1497:/workspace/softgym# . ./compile_1.0.sh
The above should compile without errors. That’s it! One can then exit Docker (just type in “exit”), though I actually would recommend keeping that Docker tab/window open on your command line editor, because any changes to the C++ code will require re-compiling it, so having the Docker already set in place to compile with one command makes things easier. Adjusting the C++ code is (almost) necessary if you wish to create custom environments.
If you are using Ubuntu 16.04, the steps should be similar but also much simpler, and here is the command history that I have when using it:
git clone https://github.com/Xingyu-Lin/softgym.git
cd softgym/
conda env create -f environment.yml
conda activate softgym
. ./prepare_1.0.sh
. ./compile_1.0.sh
cd ../../..
The last change directory command is because the compile script changes my
path. Just go back to the softgym/ directory and you’ll be ready to run.
Code Usage
Back in our normal Ubuntu 18.04 command line setting, we should make sure our conda environment is activated, and that paths are set up appropriately:
(softgym) seita@mason:~/softgym$ export PYFLEXROOT=${PWD}/PyFlex
(softgym) seita@mason:~/softgym$ export PYTHONPATH=${PYFLEXROOT}/bindings/build:$PYTHONPATH
(softgym) seita@mason:~/softgym$ export LD_LIBRARY_PATH=${PYFLEXROOT}/external/SDL2-2.0.4/lib/x64:$LD_LIBRARY_PATH
To make things easier, you can use a script like their provided
prepare-1.0.sh to adjust paths for you, so that you don’t have to keep typing
in these “export” commands manually.
Finally, we have to turn on headless mode for SoftGym if running over a remote machine. This was a step that tripped me up for a while, even though I’m usually good about remembering this after having gone through similar issues using the Blender simulator (for rendering fabric images remotely). Commands like this should hopefully work, which run the chosen environment and have the agent take random actions:
(softgym) seita@mason:~/softgym$ python examples/random_env.py --env_name ClothFlatten --headless 1
If you are running on a local machine with a compatible GPU, you can remove the headless option to have the animation play in a new window. Be warned, though: the size of the window should remain fixed throughout, since the code appends frames together, so don’t drag and resize the window. You can right click on the mouse to change the camera angle, and use W-A-S-D keyboard keys to navigate.
The given script might give you an error about a missing directory, but just
add mkdir data/.
Long story short, SoftGym contains one of the nicest looking physics simulators I’ve seen for deformable objects. I also really like the support for liquids. I can imagine future robots transporting boxes and bags of liquids.
Working and Non-Working Configurations
I’ve tried installing Docker on a number of machines. To summarize, here are
all the working configurations, which are tested by running the
examples/random_env.py script:
- Ubuntu 16.04, CUDA 9.0, NVIDIA 440.33.01, no Docker at all.
- Ubuntu 18.04, CUDA 10.0. NVIDIA 450.102.04, only use Docker for installing PyFleX.
- Ubuntu 18.04, CUDA 10.1. NVIDIA 430.50, only use Docker for installing PyFleX.
- Ubuntu 18.04, CUDA 10.1. NVIDIA 450.102.04, only use Docker for installing PyFleX.
- Ubuntu 18.04, CUDA 11.1. NVIDIA 455.32.00, only use Docker for installing PyFleX.
To clarify, when I list the above “CUDA” versions, I am getting them from
typing the command nvcc --version, and when I list the “NVIDIA” driver
versions, it is from nvidia-smi. The latter command also lists a “CUDA
Version” but that is for the driver, and not the runtime, and these two
CUDA versions can be different (on my machines the versions usually do
not match).
Unfortunately, I have run into a case where SoftGym does not seem to work:
- Ubuntu 16.04, CUDA 10.0, NVIDIA 440.33.01, no Docker at all. The only difference from a working setting above is that it’s CUDA 10.0 instead of 9.0. This setting is resulting in:
Waiting to generate environment variations. May take 1 minute for each variation...
*** stack smashing detected ***: python terminated
Aborted (core dumped)
I have yet to figure out how to fix this. If you’ve found and addressed this fix, it would be nice to inform the code maintainers.
The Code Itself
The code does not include their reinforcement learning benchmarks. That is in a separate code base, which as of March 2021 is now public. In SoftGym, there is a basic pick and place action space with fake grippers, which may be enough for preliminary usage. In the GIFs for fabric environments, you can see these fake grippers with moving white spheres.
Fortunately, the SoftGym code is fairly readable and well-structured. There’s a
FlexEnv class and a sensible class hierarchy for the different types of
deformables supported – rope, cloth, and liquids. Here’s how the classes are
structured, with parenting relationships based on the indentation below:
FlexEnv
    RopeNewEnv
        RopeFlattenEnv
            RopeConfigurationEnv
    ClothEnv
        ClothDropEnv
        ClothFlattenEnv
        ClothFoldEnv
            ClothFoldCrumpledEnv
            ClothFoldDropEnv
    FluidEnv
        PassWater1DEnv
        PourWaterPosControlEnv
        PourWaterAmountPosControlEnv
One can generally match the environment names reported in the CoRL 2020 paper with the code classes. For example, the “FoldCloth” and “SpreadCloth” environments reported in the paper correspond to the “ClothFoldEnv” and “ClothFlattenEnv” classes.
The code maintainers responded to some questions I had in this GitHub issue report about making new environments. The summary is that (1) this appears to require knowledge of how to use a separate library, PyFleX, and (2) when we make new environments, we have to make new header files with the correct combination of objects we want, and then re-compile PyFleX.
As of November 2021, I have been using the code more and thus am more familiar with it compared to when I initially wrote this blog post. If you have questions on the code, I encourage you to file an issue report.
Conclusion
I hope this blog post can be of assistance when getting started with SoftGym. I am excited to see what researchers try with it going forward, and I’m grateful to be in a field where simulation for robotics is an activate area of research.
July 21, 2021: updated the post to reflect some of my additional tests, and to add the separate reinforcement learning algorithms repository.
November 06, 2021: updated the post to clarify best practices with compiling, and to explain that I have been using the code.