My Research Workflow: Conda, Deep Learning, CUDA, Storage, and SSH
This is a regularly updated post, last updated November 12, 2022.
In the past, I have written about some workflow and coding tips, such as improving my development environment with virtualenvwrapper, organizing GitHub repositories, running and saving experiments in Python and understanding (a little) about how docker works.
As I transition to my new postdoc role at CMU as of September 2021, it feels like a good time to recap my current workflow. I am constantly trying to think about how I can be more productive and whether I should learn about this or that feature (the answer is usually “no” but sometimes it is “yes”).
In this blog post, I will discuss different aspects of my current workflow, split into the following sections in this order:
- Conda Environments
- Installing TensorFlow and PyTorch
- CUDA and NVIDIA drivers
- Storage on Shared Machines
- Managing ssh
In the future, I plan to update this post with additional information about my workflow. There are also parts of my prior workflow that I have gotten rid of. Looking back, I’m surprised I managed to get a PhD with some of the sloppy tactics that I employed!
When reading this post, keep in mind that the main operating system I use is Ubuntu 18.04 and that I do essentially all my programming with Python. (I keep telling myself and writing in my New Year Resolution documents that I will get back to coding with C++, but I never do so. My apologies in advance.) At some point, I may upgrade to Ubuntu 20.04, but the vast majority of research code I use these days is still tied to Ubuntu 18.04. I do use a Macbook Pro laptop, but for work contexts, that is mainly for making presentations and possibly writing papers on Overleaf. If I do “research programming” on my laptop, it is done through ssh-ing to an Ubuntu 18.04 machine.
Update 08/06/2022: these days, I still use Ubuntu 18.04 by default, but I now do a fair amount of research work on Ubuntu 20.04 machines. I have not gotten SoftGym working with Ubuntu 20.04, but I can run other software. I also updated this post with a new section on CUDA and NVIDIA drivers and made minor touch-ups to other areas.
Conda Environments
Starting in 2019, I began using conda environments. Previously, I was using virtualenvs coupled with virtualenvwrapper to make handling multiple environments easier, but it turned out to be a huge hassle to manage with various “command not found” errors and warnings. Furthermore, I was running into countless issues with CUDA and TensorFlow incompatibilities, and inspired by this October 2018 Medium article, which amusingly says that if using “pip install” commands for TensorFlow, “There is a probability of 1% that this process will go right for you!”, I switched to conda environments.
Conda environments work in basically the same way as virtualenvs in that they isolate a set of Python packages independent of the system Python. Here, “conda install” plays the role of “pip install”. Not all packages installable with pip are available through conda, but that’s not a huge issue because you can also run normal pip install commands in a conda environment. The process might be delicate, though (see this for a warning) but I can’t remember if I have ever experienced issues with mixing conda and pip packages.
Here’s how I get the process started on new machines:
wget https://repo.anaconda.com/miniconda/Miniconda3-latest-Linux-x86_64.sh
bash Miniconda3-latest-Linux-x86_64.sh
I use miniconda instead of anaconda, but that’s mainly because I prefer something more lightweight to make the process faster and take less disk space. Furthermore, anaconda comes with packages that I would normally want to install myself anyway later (such as numpy) so that I can easily control versions and dependencies.
To be clear, here’s what I do when I run conda envs after that bash command.
I accept the license:
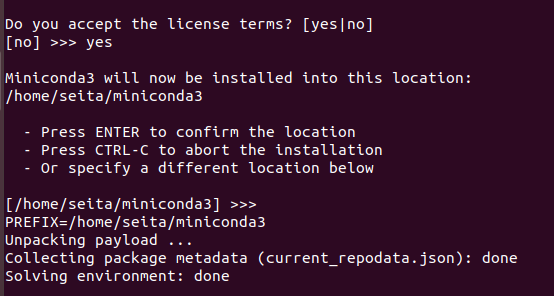
I always use the default location (click enter) which is typically
/home/<USER>/miniconda3. Then after that I will see:
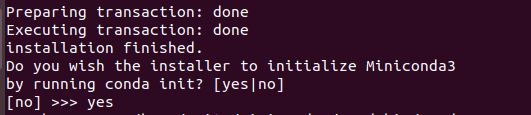
I typically say “yes” so that miniconda automatically adds stuff to my .bashrc file. After this, I can run the “conda” command right away, but I also don’t want the “base” environment to be active right away because I would rather have each new command line window start with a blank non-conda environment. Thus, after closing and re-opening the shell (typically via exiting the machine and ssh-ing again) I do:
conda config --set auto_activate_base false
This information goes into the ~/.condarc file. After refreshing with .
~/.bashrc, conda is all set up for me to use. Here are a few commands that I
regularly use:
-
conda activate <NAME>andconda deactivateto activate or deactivate the environment. When the environment is activated, useconda install <PACKAGE>. -
conda info --envsto check all my existing conda environments. -
conda list: This will check the installed packages in the current conda environment. This will also conveniently clarify if any packages were installed via pip. -
conda create --name <NAME> python=3.7 -y, to create conda environments with the specified Python version. You can add the “-y” argument to avoid having to explicitly approve the process. -
conda env remove --name <NAME>, to remove conda environments.
We now turn to discussing how conda environments work with TensorFlow and PyTorch.
Installing TensorFlow and PyTorch
Migrating to TensorFlow was the original motivation for me to use conda environments due to running into incompatible CUDA/CuDNN versions with “pip install tensorflow” commands on various machines. You can find a table of TensorFlow packages and their associated CUDA and CuDNN versions here and a popular StackOverflow post here.
As of today, the latest version of TensorFlow is 2.6.0 through pip, but it’s 2.4.1 through conda. A different set of maintainers package the conda TensorFlow version as compared to the one provided through the Python Package Index (PyPI) which is from the official TensorFlow developers, which is why there is some version lag (see this post for some context). Since it’s rare that I absolutely require the latest TensorFlow version, I focus on TensorFlow 2.4.1 here. I run the following commands to quickly start a Python 3.7 conda environment with TensorFlow 2.4.1 installed:
conda create --name tftest python=3.7 -y  &&  conda activate tftest
conda install ipython tensorflow-gpu==2.4.1 -y
Similar Python versions will likely work as well. These days, I use Python 3.6
at a minimum. Also, I just put in ipython since I like running it over the
default Python shell. Once I run ipython on the command line, I can try:
import tensorflow as tf
tf.config.list_physical_devices('GPU')
tf.test.is_built_with_cuda()
The tf.test.is_gpu_available() method is deprecated, so use
tf.config.list_physical_devices('GPU') instead. Presumably, this should give
information that is consistent with what happens when running nvidia-smi on
the command line; the first one should list all GPUs and the second one should
return True. If not, something went wrong.
This process consistently works for a variety of machines I have access to, and
gets TensorFlow working while bundling CUDA internally within the conda
environment. This means in general, the conda environment will not have the
same CUDA version as the one provided from nvcc --version which is typically
the one installed system-wide in /usr/local/. For the commands above, this
should install cudatoolkit-10.1.243 in the conda environment. This package is
347.4 MB, and includes CuDNN. Here is another relevant StackOverflow post on
this matter.
Finally, wrap things up by removing each created test environment to reduce
clutter: conda env remove --name tftest.
Hopefully that helps clarify one way to install TensorFlow in conda environments for shared machines. One day I hope that TensorFlow will be simpler to install. To be clear, it’s simple but could be made a little easier as judged by the community’s reception. (To put things in perspective, remember how hard it was to install CAFFE back in 2014-2015? Heh.) In new “clean” machines where one can easily control which CUDA/CuDNN versions are packaged on a machine on the fly, such as those created from Google Cloud Platform, the pip version could be relatively easy to install.
What about PyTorch? For PyTorch, the process for installing is even easier because I believe that the PyTorch maintainers simultaneously maintain conda and pip packages, because we have the option of selecting either one on the official installation page:

As with my TensorFlow tests, I can test PyTorch installation via:
conda create --name pttest python=3.7 -y  &&  conda activate pttest
conda install ipython pytorch torchvision torchaudio cudatoolkit=10.2 -c pytorch
As of today, this will install PyTorch 1.9.0 along with ipython. Again,
ipython is not necessary but I like including it. You can then check if
PyTorch is using the GPU(s) as follows:
import torch
torch.cuda.is_available()
torch.cuda.device_count()
torch.cuda.get_device_name(0)
Here is the StackOverflow reference. As with my TensorFlow test, this
method of installing PyTorch will detect the GPUs and does not rely on the
system’s existing CUDA version because the conda installation will provide it
for us. For Pytorch, the cudatoolkit-10.2.89 package (which is 365.1 MB) gets
installed, which you can check with cuda list. Once again, this also includes
CuDNN.
Clean things up with: conda env remove --name pttest.
CUDA and NVIDIA Drivers
(This subsection was last updated on 08/06/2022.)
Using conda environments, we can bundle CUDA and CuDNN with TensorFlow and PyTorch, which is a huge relief in avoiding headaches with version incompatibilities. However, it is (probably) still necessary to install a system-wide version of CUDA, as well as something called “NVIDIA drivers.” For example, if using a local machine with GPUs (as is common in many AI research labs which have personal machines in addition to servers and clusters), we need NVIDIA drivers to get high resolution displays.
Attempting to install CUDA and NVIDIA drivers in the past has been a nightmare. Fortunately, I think I have found a method that works realiably for me on Ubuntu 18.04 and 20.04 machines.
The first step for me is to install the NVIDIA drivers. I do this first,
before installing CUDA. I purge any prior NVIDIA drivers, and then install the
recommended drivers using ubuntu-drivers autoinstall and then reboot.
sudo apt-get update
sudo apt-get purge nvidia*
sudo ubuntu-drivers autoinstall
sudo reboot
To check that NVIDIA drivers are installed, I use the widely-used nvidia-smi
utility, but there’s also cat /proc/driver/nvidia/version.
To clarify the “autoinstall” part, it will choose the recommended NVIDIA driver to use. You can check which version it will choose:
seita@lambda-dual2:~ $ ubuntu-drivers devices
WARNING:root:_pkg_get_support nvidia-driver-515-server: package has invalid Support PBheader, cannot determine support level
WARNING:root:_pkg_get_support nvidia-driver-515: package has invalid Support PBheader, cannot determine support level
== /sys/devices/pci0000:40/0000:40:01.1/0000:41:00.0 ==
modalias : pci:v000010DEd00002204sv00001458sd0000403Bbc03sc00i00
vendor   : NVIDIA Corporation
driver   : nvidia-driver-515-server - distro non-free
driver   : nvidia-driver-510-server - third-party non-free
driver   : nvidia-driver-515 - distro non-free recommended
driver   : nvidia-driver-510 - third-party non-free
driver   : xserver-xorg-video-nouveau - distro free builtin

seita@lambda-dual2:~ $
In the example above, I’m on an Ubuntu 20.04 system with RTX 3090 GPUs, and thus the “recommended” NVIDIA driver is 515.
The references that I rely on for this process include this, this, this, and this. This post from the NVIDIA forums was also helpful, though the poster from NVIDIA requests us to use published instructions from NVIDIA. The issue is that when I have done this, I have run into numerous errors with displays not working and needing to use “tty” mode to access my machine.
Then after this, I install CUDA by using the runfile, not the debian
file. For that, I go to this page from NVIDIA to download the appropriate
CUDA toolkit for my system. The runfile will be named something like this:
cuda_11.3.0_465.19.01_linux.run.
I follow the installation instructions for the runfile, but when I do the installation, I do not install the drivers! I just install the toolkit, like this:
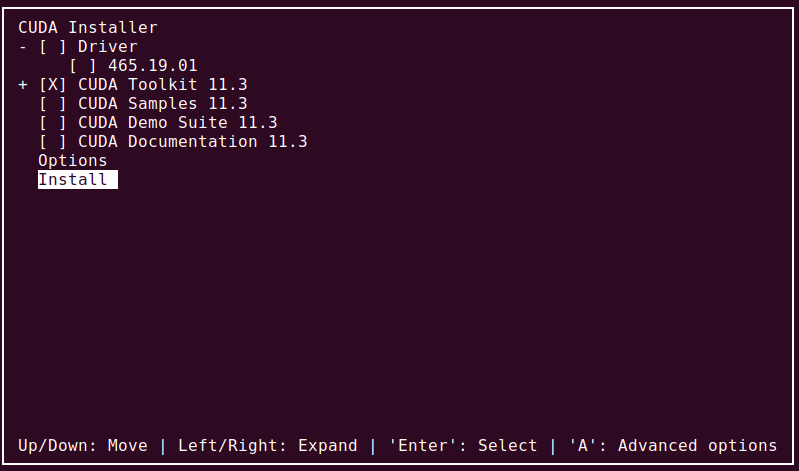
Above, I am only selecting the CUDA Toolkit, since I installed the drivers, and the other parts are not relevant.
If the installation works (a reboot might be needed), the CUDA toolkit should
appear in /usr/local:
seita@takeshi:~$ ls -lh /usr/local/
total 40K
drwxr-xr-x  2 root root 4.0K Jul  5 14:34 bin
lrwxrwxrwx  1 root root   21 Aug  4 10:46 cuda -> /usr/local/cuda-11.3/
drwxr-xr-x 17 root root 4.0K Mar  6 19:04 cuda-11.2
drwxr-xr-x 15 root root 4.0K Aug  4 10:46 cuda-11.3
drwxr-xr-x  2 root root 4.0K Sep 15  2021 etc
drwxr-xr-x  2 root root 4.0K Sep 15  2021 games
drwxr-xr-x  2 root root 4.0K Sep 15  2021 include
drwxr-xr-x  3 root root 4.0K Mar  6 18:31 lib
lrwxrwxrwx  1 root root    9 Mar  6 18:30 man -> share/man
drwxr-xr-x  2 root root 4.0K Sep 15  2021 sbin
drwxr-xr-x  6 root root 4.0K Sep 15  2021 share
drwxr-xr-x  2 root root 4.0K Sep 15  2021 src
seita@takeshi:~$
For example, here we see that the default CUDA toolkit is 11.3 because that’s
where the cuda “symlink” is pointing to, but I could have easily set it to be
11.2. We can check with nvcc --version. If that’s not working, you might need
to check your ~/.bashrc for something like this:
export CUDA_HOME=/usr/local/cuda
export PATH=${CUDA_HOME}/bin:${PATH}
export LD_LIBRARY_PATH=${CUDA_HOME}/lib64:$LD_LIBRARY_PATH
I recognize that these are not exactly the published NVIDIA instructions and that I’m probably missing something here, but this has been a simple way to get things working.
Another post from StackOverflow that helped me understand things was this
one which clarifies that we might get different CUDA versions from nvcc
and nvidia-smi after this process. I have had this happen on many of my
machines without problems.
Managing Storage on Shared Machines
In academic research labs, students often share machines. It thus helps to have a scalable, efficient, and manageable way to store data. Here’s how I typically do this for machines that I administer, where I am a “sudo” user and grant access to the machine to other lab members who may or may not be sudo (for example, I rarely make new undergrad researchers sudo unless there’s a good reason). I assume that the machine is equipped with a separate SSD and HDD. The SSD is typically where users store their local data, and because it’s an SSD rather than an HDD, reading and writing data is faster. The HDD is mainly for storing larger datasets, and typically has much more storage than the SSD.
For a clean machine, one of the most basic first steps is to make sure that the
SSD and HDD are mounted upon startup, and accessible to all users. Usually,
the SSD is automatically mounted, but the HDD might not be. I can mount these
drives automatically by editing the /etc/fstab file, or by using the “disks”
program, which will end up editing /etc/fstab for me. I suggest following
the top answer to this AskUbuntu question. My convention is to mount the
HDD under a directory named /data.
To inspect file systems, I use df -h, where the -h argument makes the sizes
human-readable. Here’s an example of a subset of the output when I run df -h:
Filesystem      Size  Used Avail Use% Mounted on
/dev/nvme0n1p1  1.9T  1.2T  598G  67% /
/dev/sdb1        13T  571G   12T   5% /data
According to the above, the SSD has 1.9T of total space (of which 67 percent is
used), and the HDD has 13T of total space. The output of df -h includes a
bunch of other lines with information that I’m not sure how to interpret; I am
guessing those correspond to other minor “drives” that are needed for Ubuntu
systems to function. I only use df -h to look at the SSD and HDD, to make
sure they are actually there, and to check disk space.
Incidentally, another way I check disk space is by using du -sh <directory>,
which will list space recursively stored under <directory>. Depending on user
privileges, the command might result in a lot of distracting “permission
denied” warnings, in which case I add 2> /dev/null at the end of the command
to suppress those messages. I recommend reading this article for more
information and useful tips on managing disk space.
After mounting the HDD, it is typically under control of root for both the
user and the group, which you can check with ls -h /. This is problematic if
I want any user to be able to read and write to this directory. To resolve
this, I usually follow the top answer to this AskUbuntu question. I
typically make a new group called datausers, and then add all users to the
group. I then change the ownership of the shared folder, /data. Lastly, I
choose this option:
sudo chmod -R 1775 /data
According to the AskUbuntu question, this means that all users in datausers can
add to /data, and can read but not write to each others files. Furthermore,
only owners of files can delete them, and users outside of datausers will be
able to see the files but not change them.
From these steps, running ls -lh / shows:
user@machine:~$ ls -lh /
drwxrwxr-t    6 root datausers 4.0K Sep 17 21:43 data
As with df -h, I am only showing part of the output of the above command,
just the line that lists data. This shows that it is correctly under the
group “datausers.”
Finally, I reboot the machine, and then now users who are in the datausers
group should be able to read and write to the /data without sudo access.
Furthermore, unless sudo privileges are involved, users cannot modify data from
other users in /data.
Managing ssh
I use many machines for work, so I need to seamlessly connect to them from any
one machine (including from a personal laptop). I use ssh: ssh daniel@<ID>,
where daniel is a hypothetical username for me on a machine, and <ID>
should be replaced with some corresponding machine ID number, which often looks
something like 123.456.7.890 with a few numbers spaced out with periods.
When I get started with a new machine, a common question I have for myself is:
what is the ID for ssh? I often use ifconfig to find the ID, though I admit
that sometimes it’s not clear from this command. If you’re trying to connect to
a machine as part of a research lab, typically the lab will have already set
some kind of address to conect with SSH. If this is a new machine, don’t forget
that it needs to have the ssh server on to accept connections (see this
AskUbuntu post).
Sometimes machines will restrict ssh access to particular ports, which means I
connect with ssh -p PORTNUM daniel@<ID>. When a port number is necessary for
ssh connectivity, I have been able to find the right port by running this
command (source):
sudo grep Port /etc/ssh/sshd_config
I also highly recommend using ssh keys. By sharing keys among machines,
this means one can avoid typing in passwords. This is an enormous benefit for
me since I might need to connect with as many as 10 different lab servers, and
I use different login passwords for each machine. For more information, I
recommend checking a source like this guide. But to summarize, here’s
what I do. Assuming I have a key from running ssh-keygen, then on my current
machine, I run a command like this:
ssh-copy-id -i ~/.ssh/id_rsa daniel@<IP>
This is the same as a standard normal ssh command, except it has ssh-copy-id
and a reference to the (public) key that I am trying to copy to the other
machine.
Assuming that command works, I should then be able to run ssh daniel@<IP>
from my current machine to the one specified with the <IP>, without
typing in a password. Amazingly, for something that I rely a lot on for my
ongoing day-to-day work convenience, I didn’t even know about this feature
until halfway through my PhD.
Conclusion and Outlook
Using conda environments has been a huge help for my research workflow, and makes it easy to manage multiple Python projects. I have also been fortunate to get a better sense for how to effectively manage a finite amount of disk space among multiple users.
Some stuff that I also use in my current workflow, and would like to write more about in the future, include VSCode, vim, more on managing ssh and internet connectivity, and Docker. I also would like to understand how packages work for C++, to see how the process contrasts with Python packages.